
A cotton swab lightly soaked with isopropyl alcohol should be inserted and rotated slowly to clean a headphone jack. Compressed air can be used to remove any leftover particles.
Dust, lint, and other debris can easily accumulate in headphone connectors, causing issues with communication and sound quality. Maintaining these connectors in excellent condition extends the life of your audio equipment and guarantees the best possible sound quality. A clean headphone jack can avoid problems like static noise, sporadic audio, and even total loss of sound, which are frequently encountered by regular users.
You may save needless stress and costly repairs with a quick and easy cleaning program. When you have the correct tools, cleaning your headphone jack is an easy task that won’t take much effort. A clean connection is the first step in ensuring your music experience doesn’t stop, therefore routinely cleaning your headphone jack should be a crucial component of your device care routine. Okay, let’s investigate how to clean headphone jack in a practical way today!
Read : Learn How to clean headphone pads properly?
Overview Of Headphone Jack Upkeep
To get the best possible sound quality, make sure your headphone jack is maintained. Lint, dust, and dirt accumulate as a result of neglect. Clear audio and a long-lasting gadget are guaranteed by a clean headphone jack.
Recognizing The Value of Clear Audio Ports

Crisp sound can be accessed using audio connections. Debris and gunk can lead to bad connections. Static, crackling, and even hardware damage can be avoided with routine cleaning.
1. Device performance is maintained with clear, crisp audio.
2. Devices and headphones have longer lifespans.
3. lessens the need for expensive replacements or repairs.
4. Finding Frequently Occurring Reasons For Headphone Jack Dirt Buildup
Recognizing the sources of dirt buildup is the first step toward prevention.
The first step to prevention is understanding “How dirt accumulates?”.
| Origins of Dirt | Preventive Actions |
|---|---|
| Lint in your pocket | Keep in a case |
| Environmental dust | Wipe the outside often. |
| Greasy hands | Before using, wash your hands. |
| Trash from surfaces or bags | Cover the ports. |
Getting Ready for Cleaning
To guarantee that your headphones last a long time, the first step is to prepare them for cleaning. You can keep your device from becoming damaged by being prepared. To ensure a hassle-free cleaning session, adhere to following tips.
Equipment and Supplies Required for a Secure Cleaning Procedure

- Using alcohol wipes or a mild cleaning agent
- Q-tips, cotton swabs, or a toothbrush with soft bristles
- Canister of compressed air
- Tweezers (to remove obstinate detritus)
- Turning off electronics and, if feasible, removing the battery
Turning off electronics and, if feasible, removing the battery
Before cleaning, make sure the gadget is always off. If the battery is detachable, take it out. By doing this, possible damage and short circuits are avoided.
Examining the Jack Before Cleaning: When to Call a Pro
Look closely at your headphone jack. Seek indications of significant damage or accumulation of dirt. If you detect anything strange, or if it looks like the jack needs more than a cleaning, get professional assistance.
Cleaning Techniques : How to Clean Headphone Jack?

Sound quality depends on keeping the headphone jack clear and working. Lint, dust, and other detritus can build up over time and result in poor connections or no sound at all. Maintaining your gadget cleanly increases its lifespan and enhances performance. Let’s look at some efficient cleaning techniques.
Clean headphone jack port Using Cotton Swabs and Compressed Air

Starting with the headphone jack dry cleaning is a safe option. How to do it is as follows:
- Turn off your gadget to avoid any damage.
- Dust can be carefully removed by using compressed air.
- Carefully place a cotton swab inside the jack.
- Swivel the swab inside the jack to gather any leftover material.
Selecting Appropriate Solutions for a Wet Cleaning Method
Switch to wet cleaning if dry cleaning is ineffective:
- Use isopropyl alcohol to wet a cotton swab.
- Using the swab, gently wipe the inside of the jack.
- Before using, let it air dry entirely.
Avoid putting liquid straight into the jack.
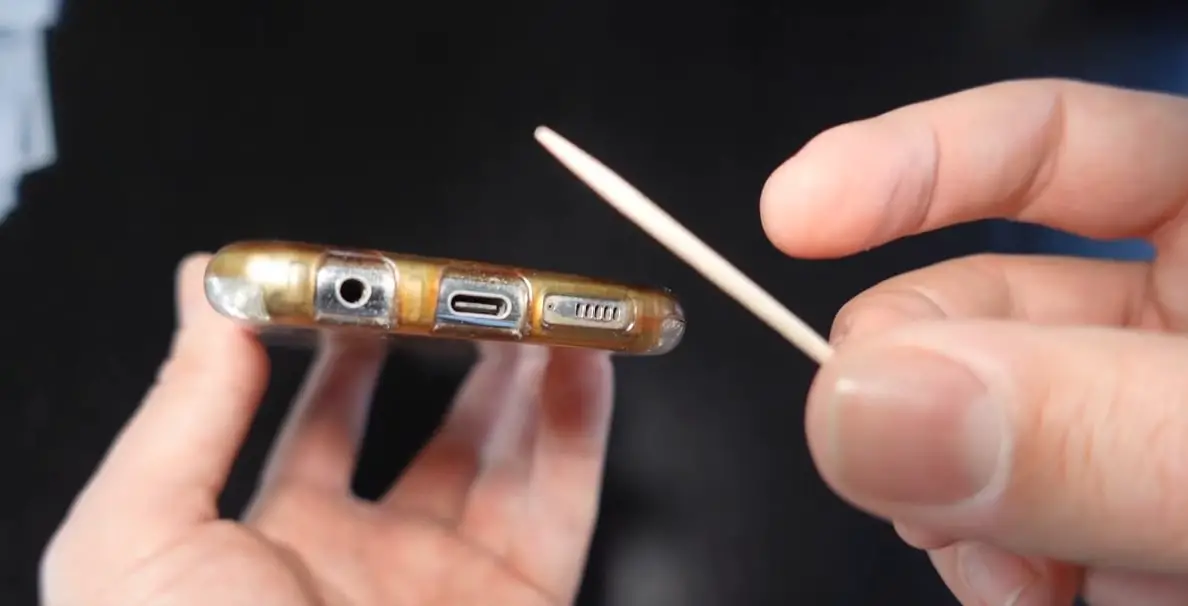
Gently Probing: How To Use A Toothpick Cautiously

A toothpick works well for removing tough debris.
- Select a toothpick that isn’t very pointed.
- Insert the toothpick gently, being careful to loosen any visible debris.
- Take care not to scratch the inside of the jack.
Alternative Strategies: Applying Tailored Cleaning Materials
For a thorough cleaning, consider purchasing a specialized cleaning kit. Usually, these packages come with :
| Instrument | Make use of |
|---|---|
| Supple brushes | To remove dust |
| Secure cleaning solution | In order to clean wet |
| Microfiber cloths | For polishing and drying |
Steps After Cleaning And Upkeep
After cleaning a headphone jack, proper steps ensure continuous top-notch performance. Let’s take a look at what to do after cleaning.
After cleaning, confirming the functionality of the headphone jack
It’s critical to assess whether your efforts were successful. In order to check the jack :
- Put on your headphones.
- Play audio from various applications.
- Look for any interruptions or static.
- Try testing the microphone with a voice call.
Precautions To Maintain A Clean Headphone Jack
To steer clear of regular cleanings :
- When not in use, utilize dust plugs.
- Maintain the gadget in a hygienic setting.
- Steer clear of the jack’s inside.
- Make use of a port-covering case.
Maintain a cleaning schedule.
Knowing When to Replace Your Headphone Jack vs. Clean It
Cleaning repeatedly might not always be the solution. Think about replacing when :
| Regularity of Cleaning | Sound Quality | Physical Damage |
|---|---|---|
| If you clean frequently | Sound quality is still lacking. | Obvious harm to Jack |
Seek expert counsel if any of these symptoms materialize.
Frequently Asked Questions About Headphone Jack Cleaning
Can Problems Occur From A Dirty Headphone Jack?
An unclean headphone jack can cause sporadic audio, low sound quality, and finally make it impossible for headphones to connect correctly. These problems can be avoided and resolved with routine cleaning.
What Supplies Are Necessary for Cleaning My Headphone Jack?

You will need a cotton swab, rubbing alcohol, compressed air, a toothpick or a fine brush, and compressed air to safely clean your headphone jack. These are useful instruments for effectively removing filth, lint, and dust.
How Often Is It Necessary To Clean The Headphone Jack?
It’s best to just clean your headphone jack every few months. You may need to clean your gadget more frequently, though, if you find that it malfunctions or if you use it in dusty surroundings a lot.
Is Rubbing Alcohol Safe to Use in a Headphone Jack?
Yes, cleaning a headphone jack with a modest bit of rubbing alcohol is safe. It works well to dissolve dirt and evaporates fast to stop moisture damage. Make sure the swab isn’t excessively moist.
Read : Best Budget Sennheiser Headphones
In summary
Maintaining a clean headphone jack extends the life of your audio equipment and guarantees peak performance. Recall that regular maintenance with the appropriate tools is essential. For consistent, high-quality sound that never cuts, adhere to these instructions. Your efforts will protect both your equipment and your listening pleasure.
Smartly clean, enjoy your music!